
First create empty HDA. Its simpler to not rely on the hip file at all and work from the start in an HDA.
Go to a ropnet or /out and drop a subnetwork, then highlight RMB→ Create Digital Asset. There are lots of options when creating and HDA, but only going to touch on those meaningful to this series of posts.
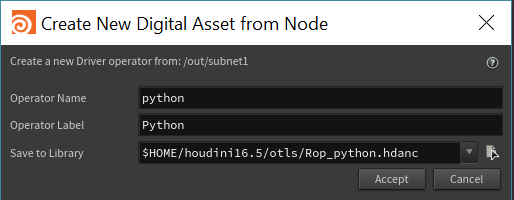
Name the HDA something meaningful. Standard naming would be to name the file with Context_mytool_name.hda (or otl or hdanc or otlnc depending on your prefs and license). The tool is in snake as my_tool and the Title to be similar and in title case My Tool. The dialog does a pretty good job of getting you most the way there but may require some hand editing depending on the order of fields edited. Use ROP_python.hda for the file python for the name and Python for the Label.
Then Press Accept.
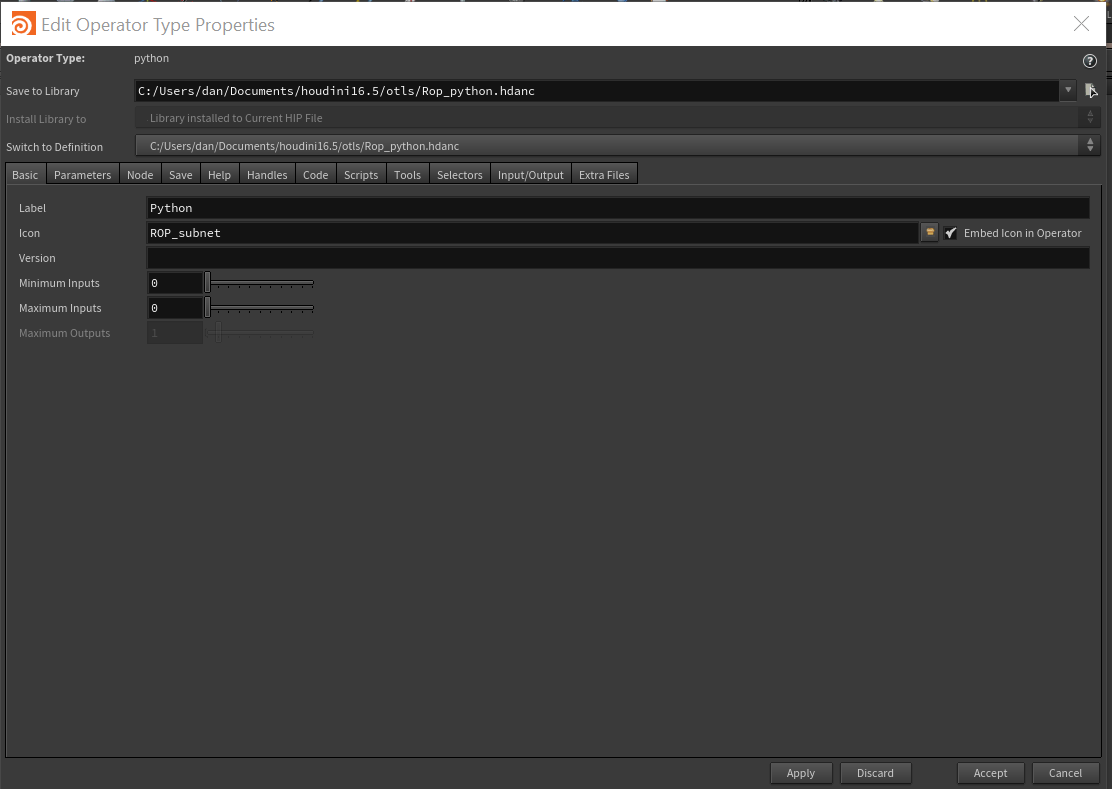
This Will open the edit Type Properties Dialog (see below). On the Basic Tab, change “Max Inputs” to one. There will be need to use this node at the top or middle of a Rop chain. Press Apply.
Leave this open for now and place it in an area where the network graph and parm editor wont be obstructed. If using Build desktop, try placing it over the viewport, as it wont be used right now, or find another good place.
**NOTE we want to keep this dialog on top, depending on your window manager and settings, Linux users may need to force this via the Houdini preferences or via the window manager – typically RMB on the dialog title bar and the popup or a submenu will have the option to force to top.
In the next section we will start on the parameter interface build.