Python Rop: Part 5 — Inner Workings

There a handy Rop for TDs and pipeline folks called “Shell,” It’s pretty great and allows calling to the shell to run systems commands… but we are not going to use it, well not so much as intended, but going to take advantage of a peculiar feature.

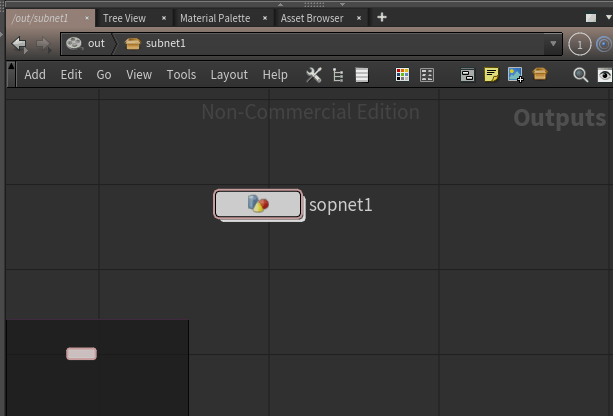
In the Network Graph, while still inside our working subnet, drop a Shell node. When you look at the Parm Pane you will see options for running Unix/Shell command. Leave this alone. What is interesting is when left blank it still executes the pre and post commands.

Parm Editor Pane for Shell Rop on Script Tab

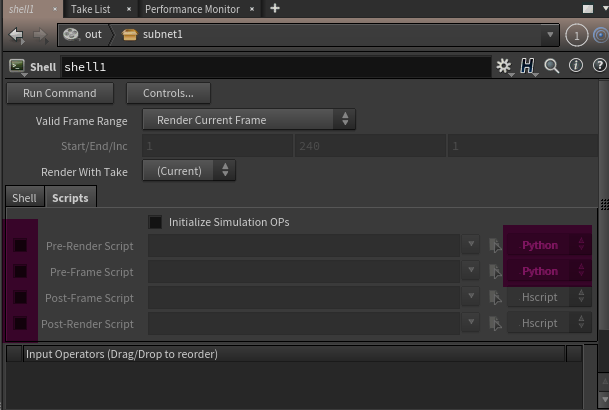
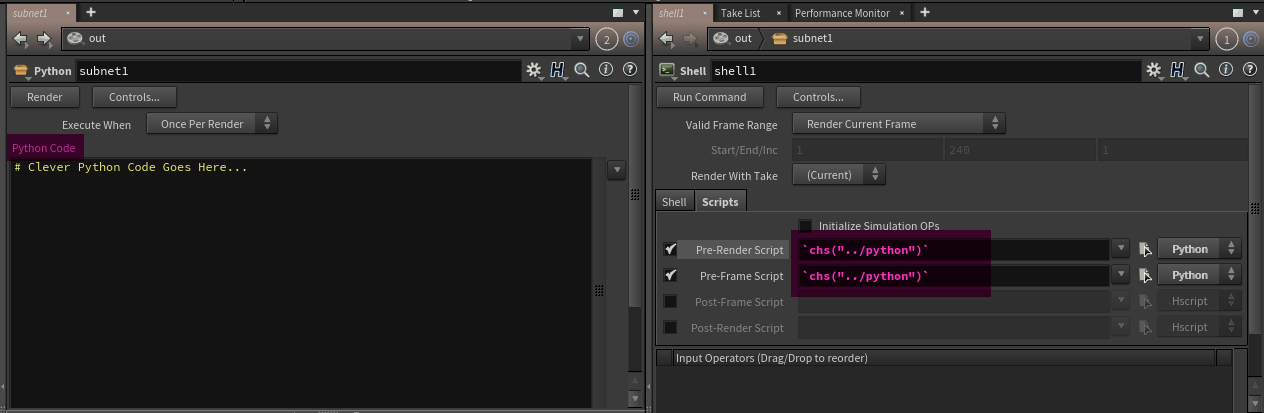
In the Parm Editor, click the Scripts Tab for the shell node. This is the place of interest. We are going to leverage the preframe and prerender parms to run our python. (It could also be the post equivalents, as it before and after running nothing essentially.)

  • Change the Pre-Render and Pre-Frame Script Languages to Python.
  • Switch toggles on the left to off.

**NOTE Next is parm linking and working with both our working Python Rop subnet and the interior shell Rop parms. I often find this easiest with 2 Parm Panes open. If using the Build desktop, a new tab can be created over the network pane, and both pinned (or linked depending on settings) or you may choose to have floating Parm Panes or dive in and out of the Network. However for clarity I will be showing these panes side by side.

Parm Panes Side By Side For Python Rop and Shell Rop Highlighting Fields to Link

The left Python Rop, the right will be the Shell Rop.

The content of the Python Code Field needs to be accessible to prerender and preframe parms on the Shell Rop. This is easily done with a channel reference. It will be referenced in both places as they are mutually exclusive and we want to be able to easily switch between them on the Python Rop UI.

RMB on Python Code Label on the Python Rop Working Subnet, (where we had dragged from on the Python Sop), RMB → Copy Parameter. Then on the Shell Rop, first in the Pre-Render Script field, enable the field and RMB→Paste Relative References. Do the same for the Pre-Frame Script.

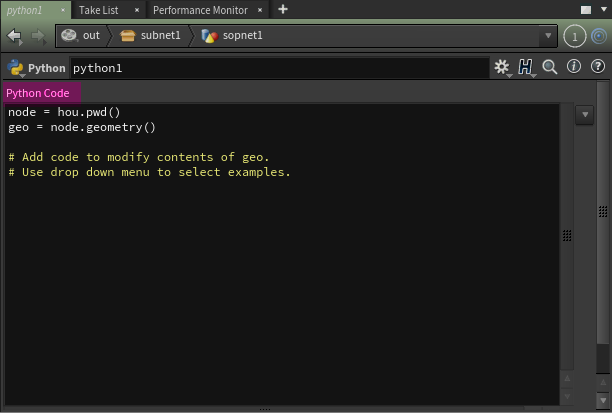
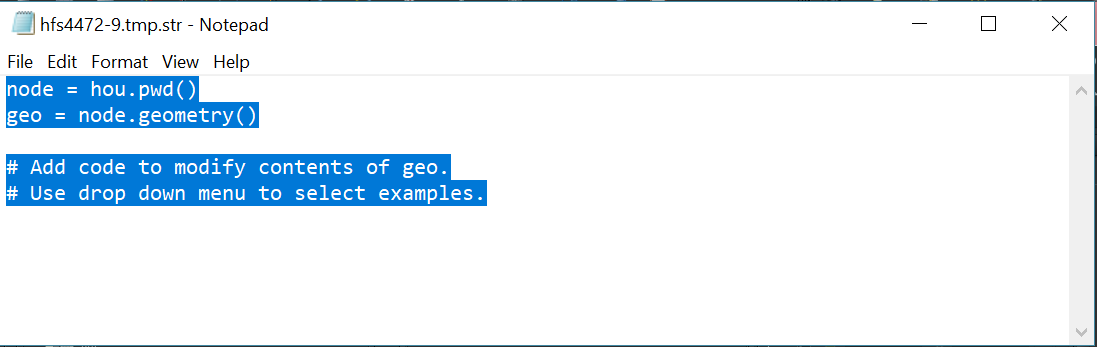
**NOTE We can also see the sensible boiler plate we added earlier now appears in the Python Code field.

Parm Panes Side By Side For Python Rop and Shell Rop Highlighting Toggle and Pulldown to Link

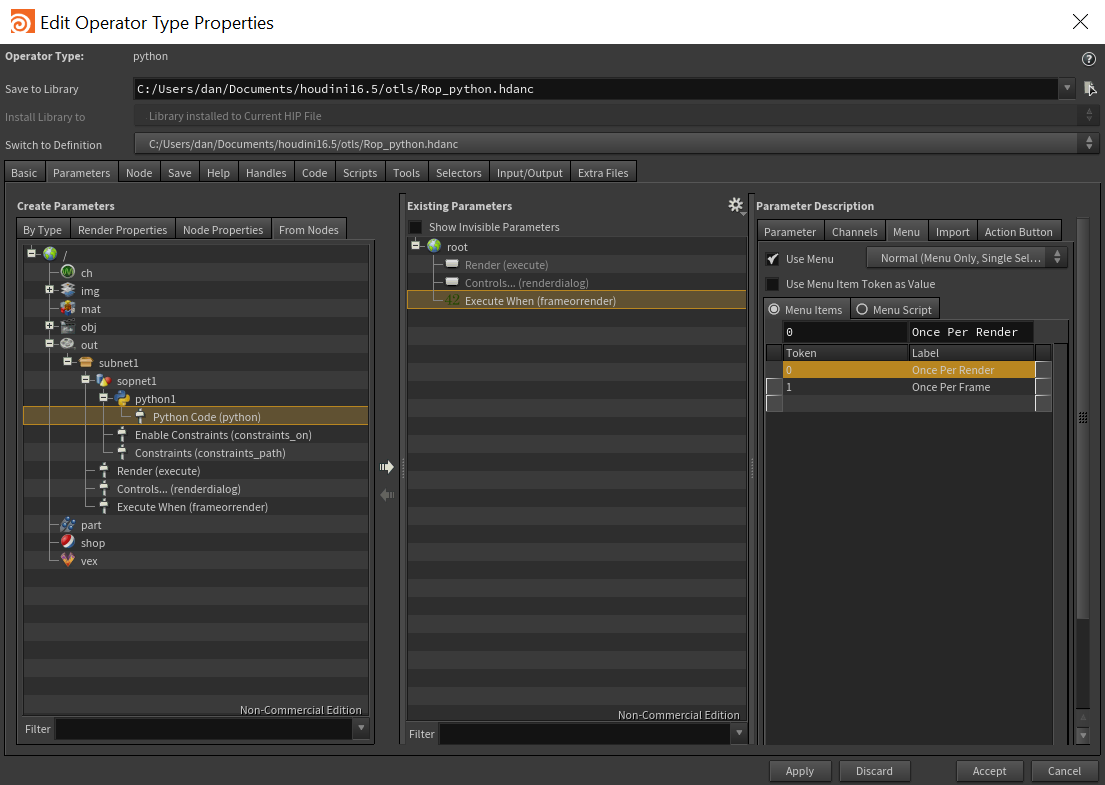
The integer menu added earlier, is going to control the selection of Pre-Render or Pre-Frame. On the Execute When Label, previously created on the Python Rop, RMB→ Copy Parameter.

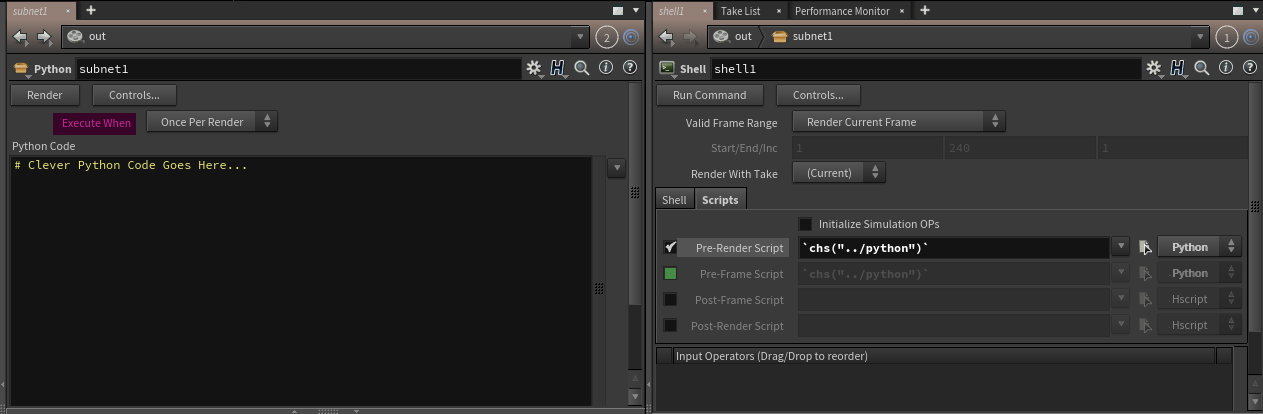
If you recall the 1 Value is for “One Per Frame.” 1 implies on and can be used to enable the Pre-Frame Script Field. On the Shell Rop parms, Pre-Frame togglebox, RMB→Paste Relative Reference. Make sure to do this on the togglebox and not the adjacent label. It will highlight green, and if you have both Parm Panes open you can change the int menu to turn on and off the Pre-Frame Script execution on the Shell Rop.

The inverse is needed for the Pre-Render Script. The int was value 0 for “Once Per Render”, which would disable it when chosen, as it did for Pre-Frame Script. Lets get the same starting point by RMB→ Paste Relative Reference on the togglebox for Pre-Render Script.

Expression Editor Showing Parm Expression on Shell Rop Toggle fo Pre-Render Script Enable

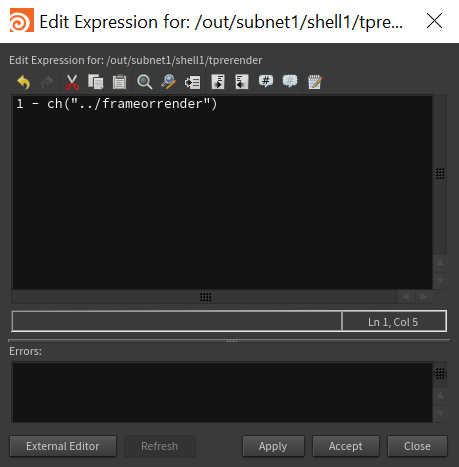
To invert it. RMB again on the toggle box and select Expression→Edit Expression. The expression editor will open. Simply Prefixing this chanref with 1 will create the opposite effect as before. This should be fairly obvious as 1-1=0 and 1-0=1.
Press Accept.

You should now be able to change the menu on the Python Rop and see these alternate fields on the Shell Rop enable in a mutually exclusive fashion keeping to the menu selection.

In the Network Graph, select the Python Rop and RMB→ Save Node Type
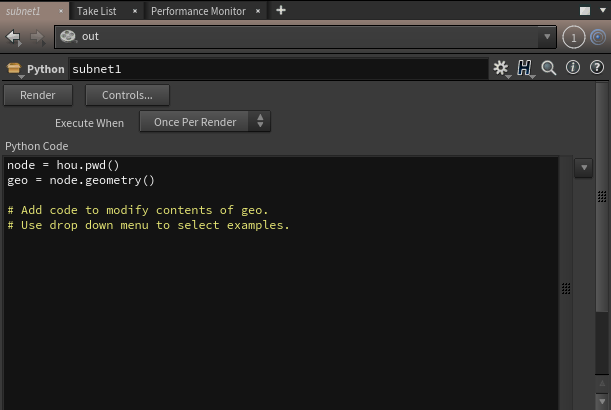
Changes are now committed to this new HDA. Time to test. Select the Python Rop and in the Python Code Field enter

print hou.pwd()

Parm Pane for Python Rop and Py Shell Side by Side Showing Unexpected Output

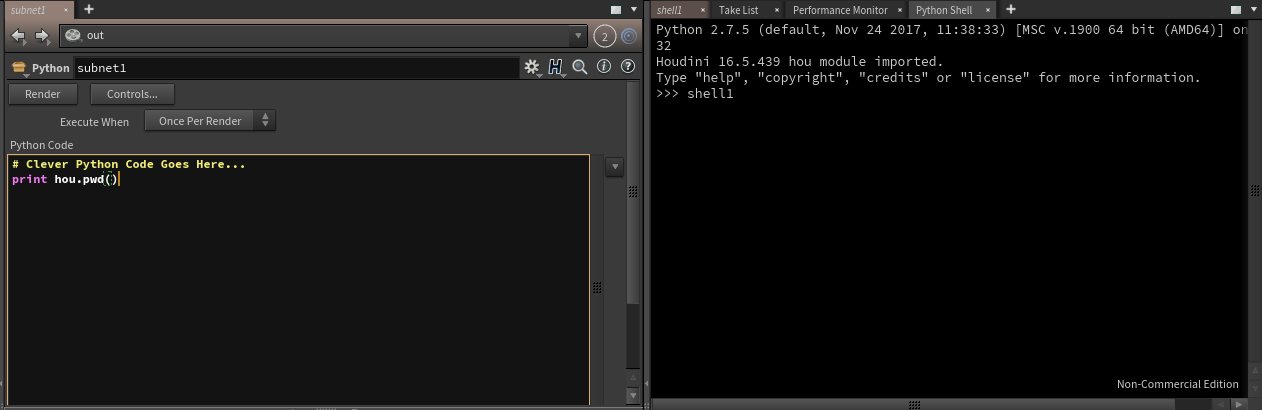
Open a Python Shell and Press Render Button on the Python Rop. If all is well there will be output in the python shell. Success!… or is it?

Something has happened. It is printing ‘shell1’, the interior node name to the Python Shell. That is because it is where the script is actually executing. Unfortunately, unlike some other nodes there is no easy way to set the execution path. Since this is not obvious, it is best to go back to our default boiler plate grab the correct node so its obvious and easy to use.

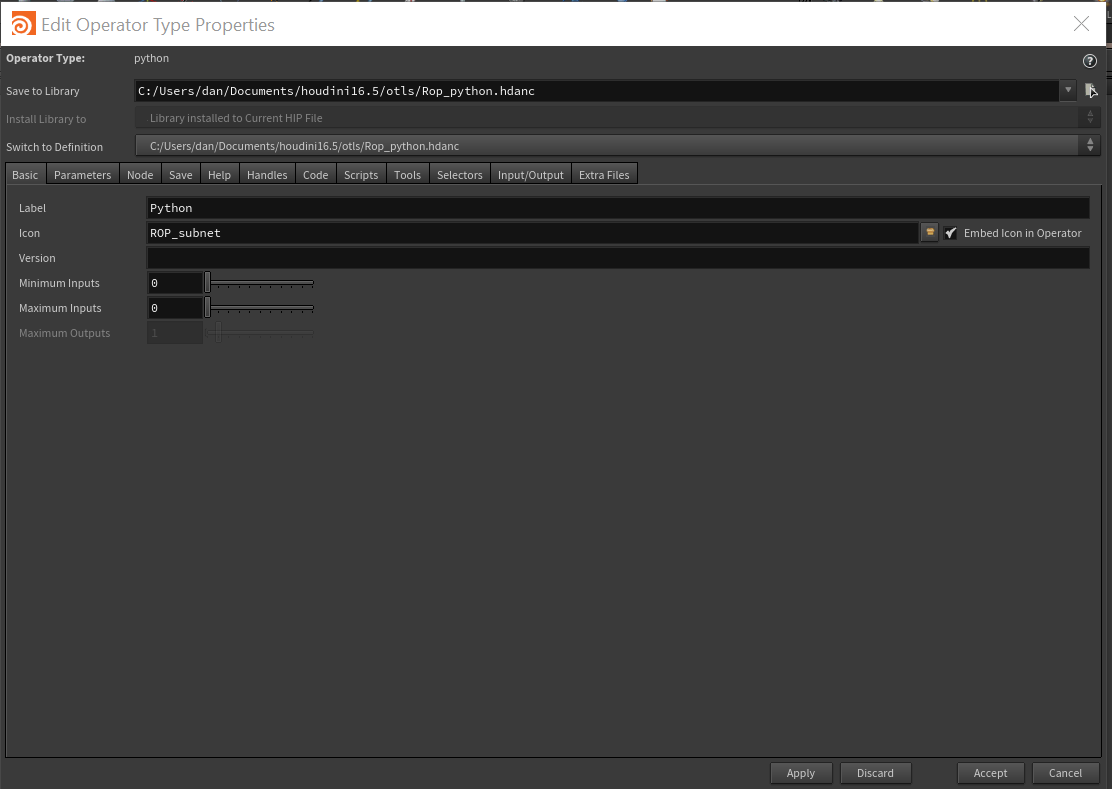
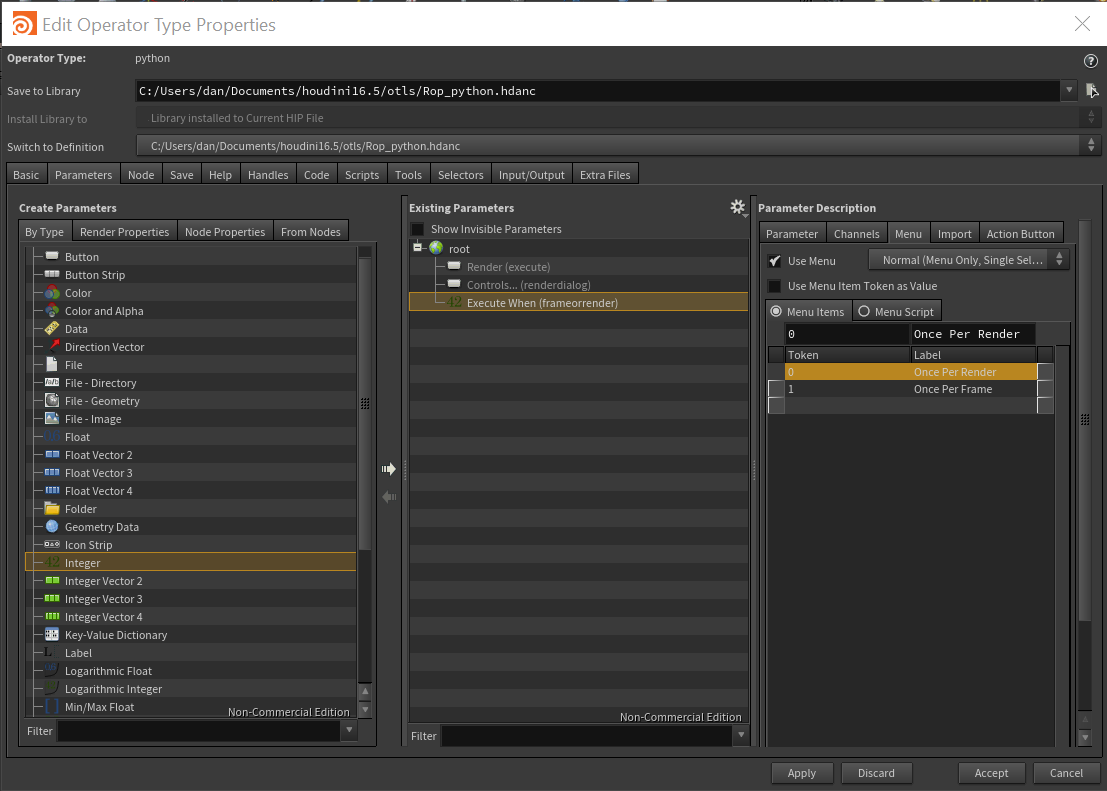
  • In network Graph, on Python Rop, RMB → Type Properties
  • In middle Existing Parameters column select Python Code.
  • On Right Parameter Description column make select the Channel Tab
  • In first field ALT+E to get to our default editor or type in the field directly (add a carriage return ie \n if you do).

Notepad Showing Updated Boiler Plate Defult for Python Rop Python Code Field

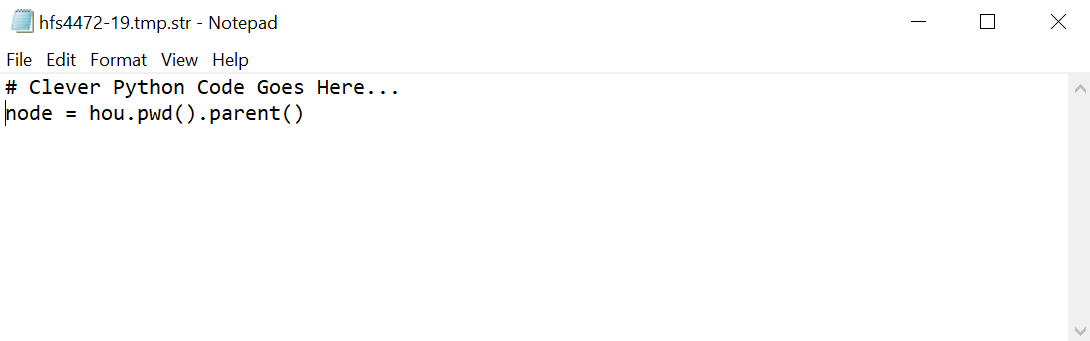
Add this bellow previous boiler plate comment:

node = hou.pwd().parent()

Save and Close your text editor. This will now have boiler plate where the typical node variable points to the expected place, hopefully to clear up any confusion, since it isn’t obvious.

On Type Properties Dialog, Press Apply.

**NOTE If the script in the Python Rop’s Python Code field did not update to new boiler plate. On Python Code Label RMB→ revert to defaults

Parm Pane for Python Rop and Py Shell Side by Side Showing Expected Output

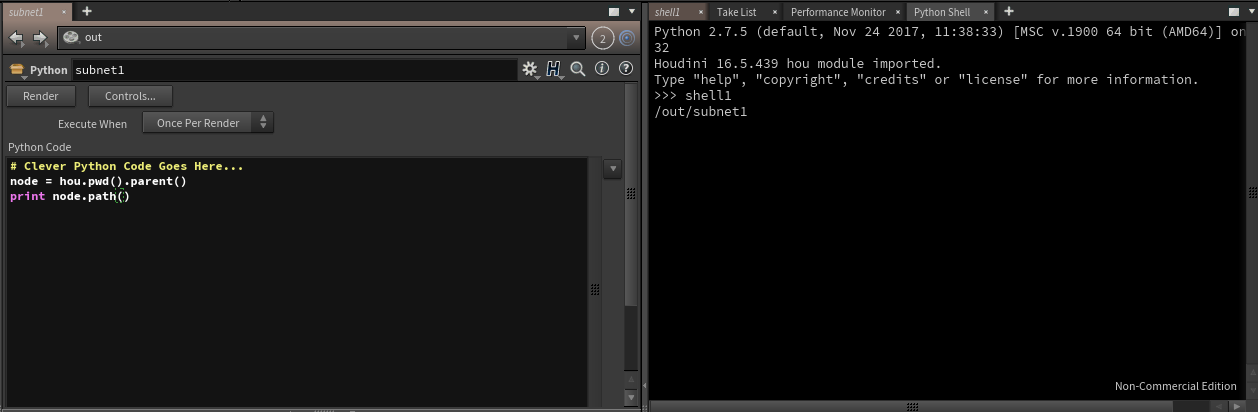
Enter on the python Rop Python Code field, beneath the boiler plate add”

print node.path()

Press Render.

Success! You should now see the proper path to the Python Rop.

Some Finishing Touches. Its best to have descriptive errors. Currently we may see an error like “there was an error on shell1” – this isn’t very useful. It is best to have these errors “bubble up” to out top HDA to be easily seen.

Edit Type Properties Node Tab Messaging Nodes Highlighted

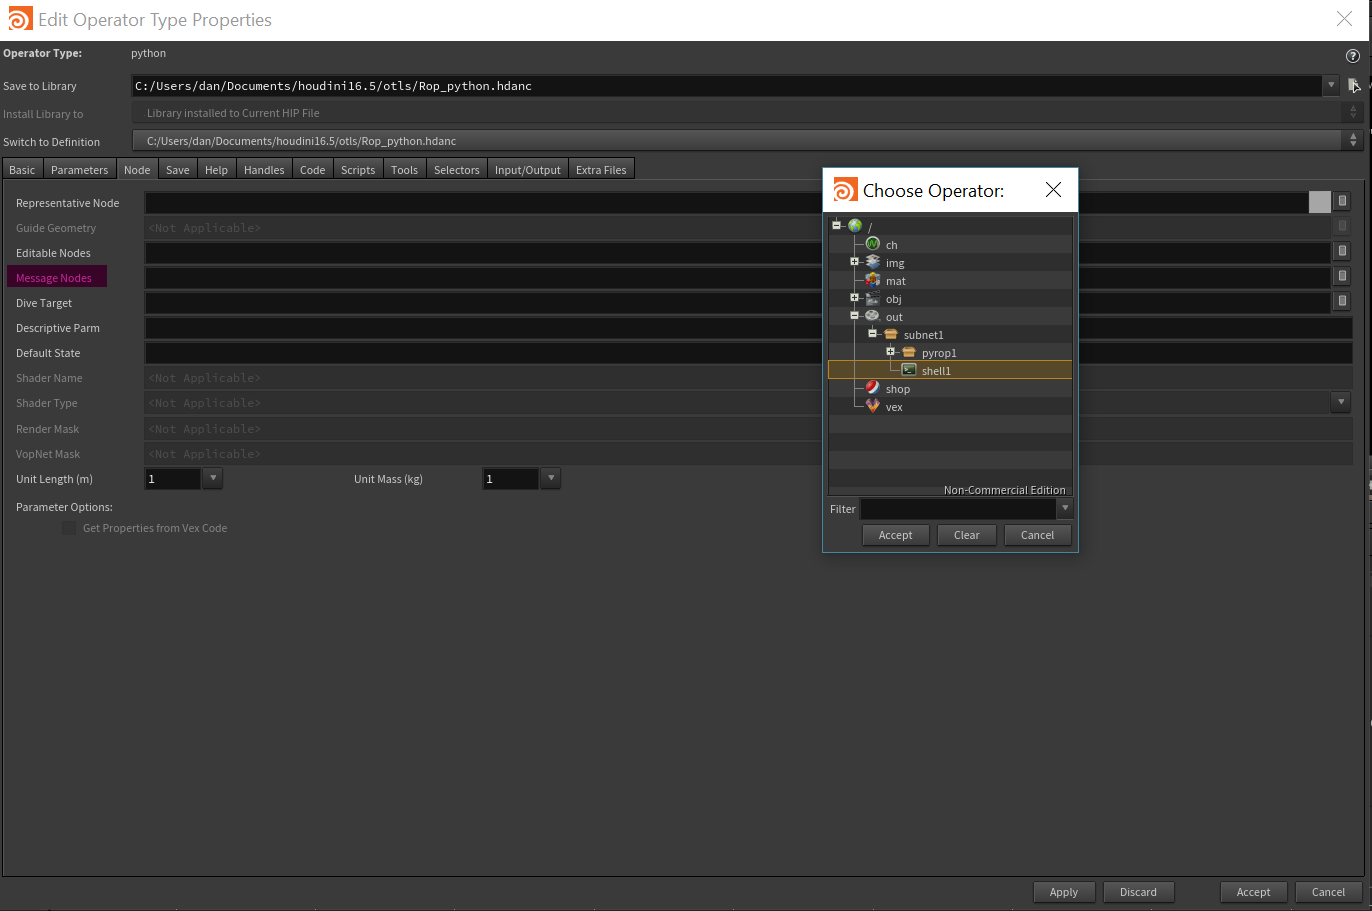
  • Type Properties Dialog should still be open, if  not, then open it from Python Rop.
  • Go To the Node Tab
  • Click to browse button to right of Message Nodes, and select shell1 and accept.
  • On Type Properties Dialog, Press Apply.

For some extra polishing, I downloaded a python logo SVG (with proper usage rights) and embedded it into the operator, via the Node Tab of the Type Properties Dialog.

That about it. Hopefully this was useful as a HDA building tutorial or for some tricks for advanced users. Head over to downloads to grab a copy of the finished HDA

Happy CG’ing
(|:-D>

Python Rop: Part 4 — Cleanup

While the Parameter Interface in the works, we have very little of use, as the Python Sop will error out without an input. We actually don’t need it, all the ‘heavy lifting’ will be done in the land of Rops. We need to clean up and then flesh out something that can actually cook in Rops.

As mentioned there’s no actual need the python sop. We took a copy of it’s Python Code Field and now no longer need it. Go inside the subnet, select the sopnet  previously created and DELETE it. Now we can turn attentions back to the Type Properties Dialog.

Type Properties Editor on Python Rop Showing Menu Tab and Fields to Cleanup.

In the Middle Existing Parameter column, select Python Code Parameter. On the right Parameter Description Column select the Channels Tab. The highlighted fields shown need to be changed.

First make sure the 2nd icon for linking is not depressed, then delete the entry in Linked Channels  sub-columns. This is garbage pointing to the now nonexistent python sop.

This can be edited directly or if you have a text editor set up, click inside the field and ALT+E to open it. On Windows this defaults to notepad.

Note Pad Showing Not Functional DEfault For Python Code Field Left by Py Sop

On the left the is a default. This default is from the Python Sop and no longer appropriate as Rops does not have geometry to deal with directly.

Notepad Showing Python Rop Python Code Field New Default Comment

In my case I didn’t want any boiler plate code.. so simply deleted it all and replace with

# Clever Python Code Goes Here…

Save and closed notepad and the results populated the Field.

Notepad Showing Python Rop Python Code Field Menu Cleanup

Again on the far right Parameter Description column, select the Menu Tab. This area can be populated similarly with our text editor or directly in the field. The purpose is essentially Presets.’ The left field is a python snippet and the right field a Label. The small pull-down to the right of the Python Code field, displays the label and when selected, populates the Python Code with the snippet. You can add your own commonly used Python Snippets here later. However, the current preset is for a Sop and not of use, so simply delete the contents of both sub-columns.

On Type Properties Dialog, Press Accept.
Allow the dialog to close.

Most of the work in the next section will be in the Parmameter Editor Pane.

Python Rop: Part 3 — Parameter Interface Build

Now to start on the UI. In the Edit Type Dialog got to “Parameters” Tab. In the left column make sure “Create Parameters” tab it on “By Type.”

Add Int Parm in Type Properties

First we want to create a quick pull down that will return a 0 or 1. We will then use this to control a toggle to run the python node once per render or once per frame.

Find and highlight “integer” on the left By Type column, and then LMB+DRAG it to the center Existing Parameters section on to “root”. This should place an integer parameter beneath the two existing. If it was created, but not in the right spot, drag to reorder the parameters in the center column until it resembles image above.

In the far right column, make sure you are on the Parameter Tab. Enter for name frameorrender and Execute When for the label.

Add Int Parm Menu Edit in Type Properties

On the far right Parameter Description column, got to Menu Tab and toggle on “use menu.” Make sure you are on the Menu Items radio Tab. Enter the following two menu items that will display text and return an int:

For the first, set Token to 0 and Label to Once Per Render.
For the Second set Token to 1 and Label to Once Per Frame.

Press Apply.

Parm Editor With In Pulldown
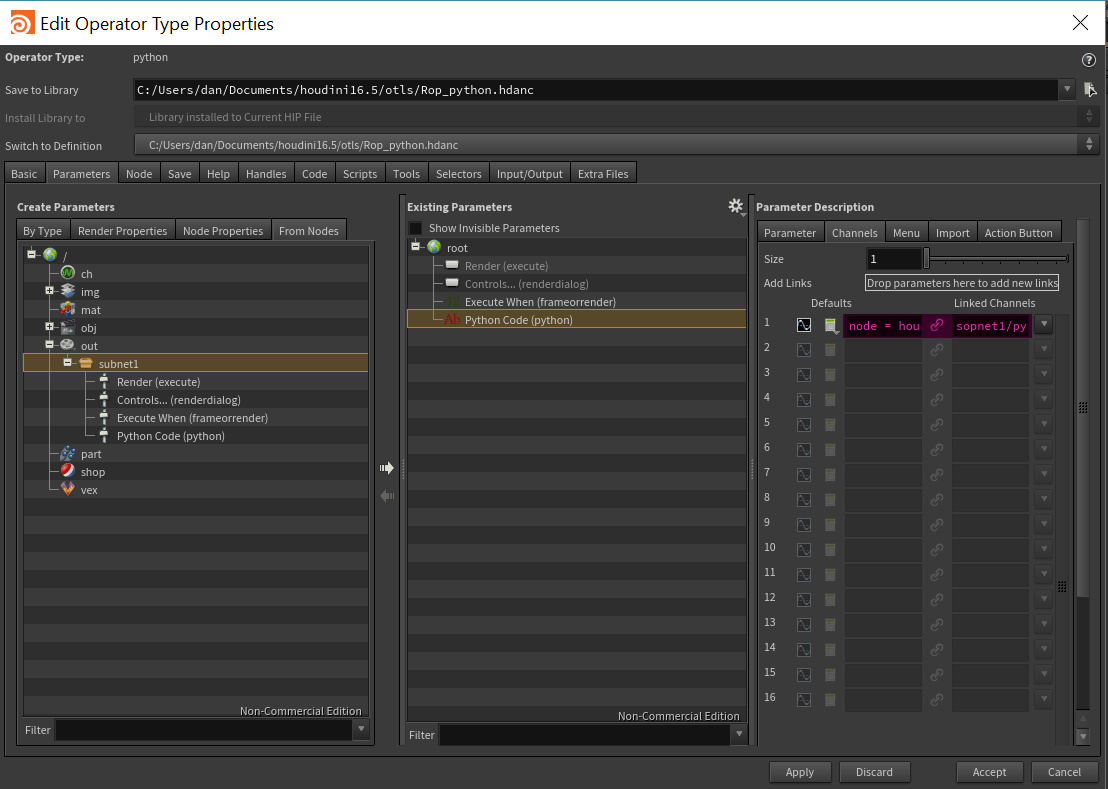
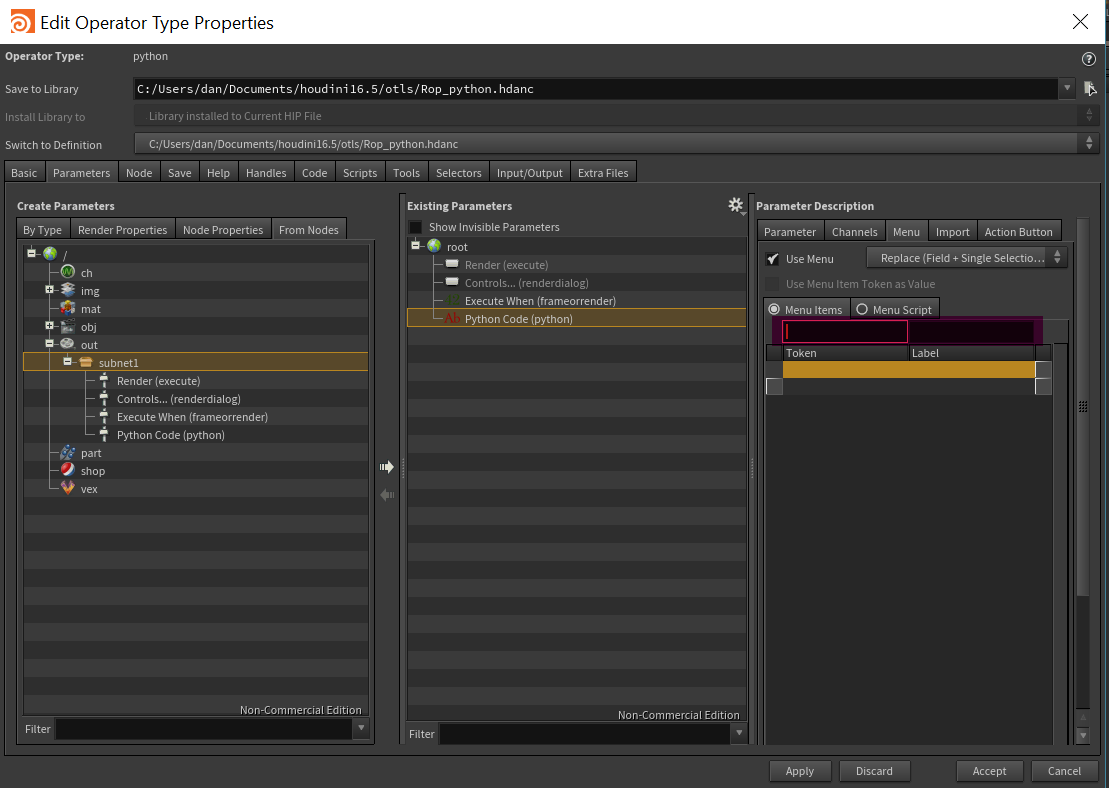
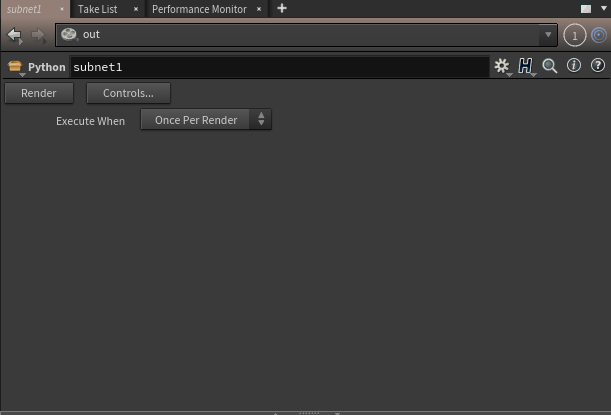
The Parm Pane should look similar to above image.
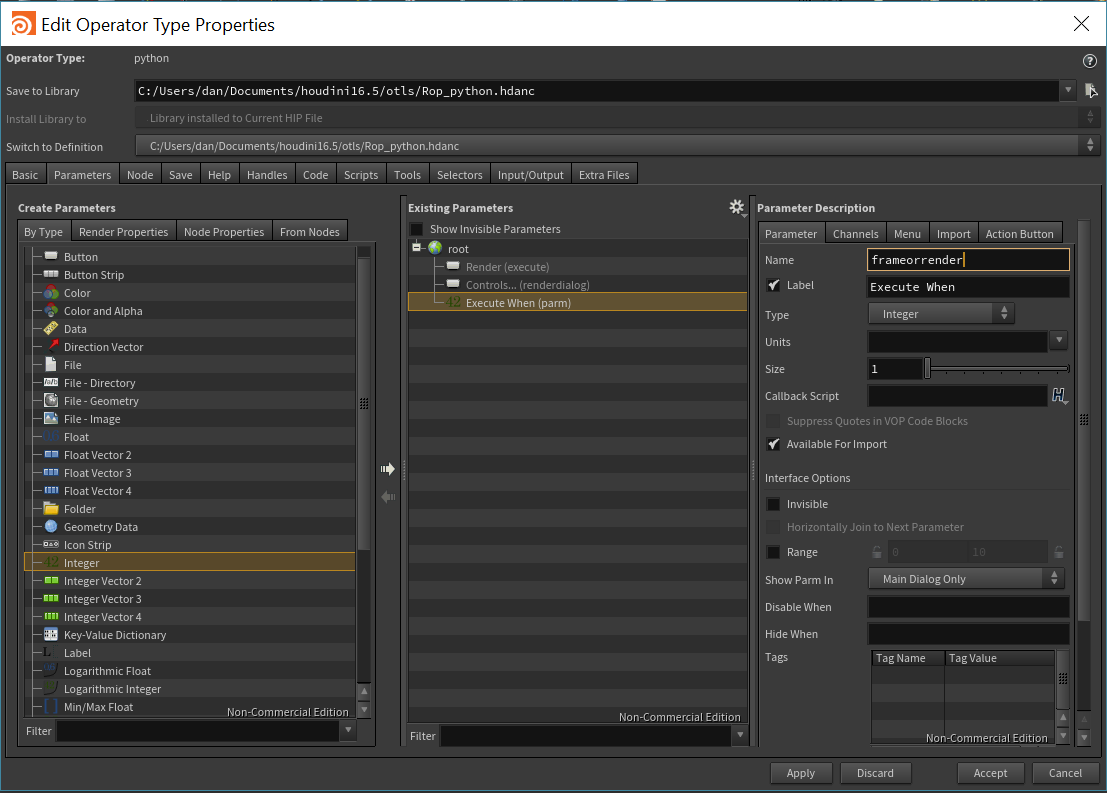
The Python Code Editor. We want a python editor in the Parm Pane similar to the python sop. But what is this editor? It doesn’t appear in the Parms By Type list — or does it? … well kind of.

The Python Code editor is a special look/feel for a string field with some tags and setup. This can be created with python or in the Type Properties editor from scratch — but we are not going to do that. If there is significant interest I can make a followup post on how, but there is no reason other than Geek Points. Geek Points are cool, but time is more valuable and same place can be gotten to faster. We already know we want the familiar python sop interface we know and love, so we are simply going to start there.

Netwrok Pane With Sopnet Inside Rop Subnet

Press ENTER to Dive inside the subnet we are working on. Place a sopnet.

Netwrok Pane With Py Sop in Sopnet Inside Rop Subnet

Press ENTER to dive inside the sopnet and place python sop.

Now there are 2 options. The first is preferred as it gets us there faster.

Parm Pan For Python Sop Python Code Label Highlighted

Option 1: If you have Type Properties on top and the Parm Pane visible, Click on the label “Python Code” (highlighted in image) and LMB+DRAG it to the root , on the center Existing Parameters Column of the Type Properties Editor.

Edit TYpe Properties Parms From Node Py Sop Python Code Selected

Option 2: If not all panes are visible or if you are on Linux and your Window manager configuration doesn’t particularly like the pane dragging.

  • Change the far left column Create Parameters to the From Nodes Tab.
  • Navigate the tree to inside python sop.
  • LMB+DRAG The “Python Code” Label to the Middle Exiting Parameters Column on to root.

Either method should now add “Python Code” immediately below our previously created menu. As before, if not in the correct order, drag to reorder.

Press Apply.

The sops Python Code Field will turn green indicating its channel referenced to the top HDA’s UI, this is fine for now. Click in the network editor and press u key twice to return to out working HDA, highlight it and the Parm Pane should now look similar to above.

Python Rop Parm Pane Showing Python Code Field

Great! We have an interface and are well on the way.
Lets bring everything together and make it do work in the next section.

Python Rop: part 2 — Create Bare HDA

First create empty HDA. Its simpler to not rely on the hip file at all and work from the start in an HDA.

Go to a ropnet or /out and drop a subnetwork, then highlight RMB→ Create Digital Asset. There are lots of options when creating and HDA, but only going to touch on those meaningful to this series of posts.

Name the HDA something meaningful. Standard naming would be to name the file with Context_mytool_name.hda (or otl or hdanc or otlnc depending on your prefs and license). The tool is in snake as my_tool and the Title to be similar and in title case My Tool. The dialog does a pretty good job of getting you most the way there but may require some hand editing depending on the order of fields edited. Use ROP_python.hda for the file python for the name and Python for the Label.

Then Press Accept.

Type Properties Editor Basic Tab

This Will open the edit Type Properties Dialog (see below). On the Basic Tab, change “Max Inputs” to one. There will be need to use this node at the top or middle of a Rop chain. Press Apply.

Leave this open for now and place it in an area where the network graph and parm editor wont be obstructed. If using Build desktop, try placing it over the viewport, as it wont be used right now, or find another good place.

**NOTE we want to keep this dialog on top, depending on your window manager and settings, Linux users may need to force this via the Houdini preferences or via the window manager – typically RMB on the dialog title bar and the popup or a submenu will have the option to force to top.

In the next section we will start on the parameter interface build.

Python Rop: part 1 — Intro

This post will be a short tutorial with multiple purposes. Its a solid intro to HDA building for beginners that will yield something actually useful. For more advanced users it might contain some useful tricks, and serves as a quick tutorial on how to build the node which will likely take under an hour.

Why?

Convenience. We often talk about creating conveniences. It usually implies something that does not add any new feature or functionality; it simply enables a user in a more familiar or intuitive way. A python Rop simply provides the familiar python interface available in other context to Rops.

While the pre and post scripts exist on many the included Rops, many third-party Rops, especially those for render engines, may not. This allows having that additional functionality without altering the shipped Rops or having to maintain wrapper otls – just to encapsulate multiple nodes elevating their interfaces to a single one – per node.

A third use is for altering the network during evaluation at render generation time. There could be any specific needs that would require render time evaluation of the graph or require adhoc alterations. Having a python sop couldbe valuable for prototyping, debugging, and adhoc one-offs where no real development resources are necessary.

This is a cool little node and when we are done walking though the tutorial will have a useful tool in our Houdini arsenal. I am working in non-com and have made the Rop available for download for those that want it to dissect along with the tutorial or to skip the tutorial all together. I will try to make a normal HDA available in the near future. I would appreciate it if you like the HDA and want to share it, you send them to the blog so I can see interest in various projects I make available to plan future posts.

With that said, lets get to building.

uiS[cript]Py: Quick 1st Example

NOTE there seems to be a quirk where wordpress is mutating certain symbols so to use example properly for now, please copy and paste to a text editor, and replace the single quote with.. Yes, what appears to be the same single quote on your keyboard… if you run into this issue. When I have it patched, this note will no longer ne here. Thanks.

Here is a quick example to get everyone started. Its not particularly meaningful but shows basic usage. The manual is in HTML with the download and is fairly complete. If its in there and promoted to the uispy namespace, for the most part its been working. Methods have docstrings and if using the built-in houdini Py Shell, you will see them as normal in the nice little popup.

import uiScriptPy as uispy

# basic container is needed in this case a row
myrow = uispy.ColunnUiScriptContainer(‘myrow’)

# a simple float tuple
myfloat = uispy.FloatUiScriptGadget(‘myfloat’, ‘My Float’, 3)

# Top of dialog
mywin = uispy.DialogUiScriptWindow(‘mywin’, ‘My Win’)

# set the float to the row
myrow.setUiScriptGadgets((myfloat,))

# set the container to the dialog
mywin.setUiScriptGadgets((myrow,))

# create a basic interger and set range on slider
myint = uispy.IntUiScriptGadget(‘myint’, ‘My Int’)
myint.setSliderRange(-10,10)

# append slide to the row container
myrow.addUiScriptGadget(myint)

# color widget with alpha
mycolor = uispy.ColorUiScriptGadget(‘mycolor’, ‘My Color’, has_alpha=True)

# a password string field
mypassword = uispy.StringUiScriptGadget(‘password’, ‘Password’)
mypassword.setIsPassword(True)

# a lablel with a little styling
mylabel = uispy.LabelUiScriptGadget(‘mylabel’, ‘My Label’)
mylabel.setTextLook(uispy.uiScriptTextLook.underline)

# basic column container
mycol = uispy.ColunnUiScriptContainer(‘mycol’)

# add color, password, and label to column
mycol.addUiScriptGadget(mycolor)
mycol.addUiScriptGadget(mypassword)
mycol.addUiScriptGadget(mylabel)

# a collapser is uncommon but useful to conserve space
# create collapsed initally, and containing column of widgets  
mycollapser = uispy.CollapserUiScriptContainer(‘mycollapser’, ‘My Collapser’, (mycol,), collapsed=True)

# set the row and collapser to the window
mywin.setUiScriptGadgets((myrow, mycollapser))

# create the dialog from the script
d = mywin.createHouDialog()

# now we can retrieve a gadget from the dialog
#  this can be thought of similar to a parameter object
#  for the parameter pane via parmTemplates
myfloat_gadget = d.uispy_gadgetTuple(‘myfloat’)

# query the raw values
myfloat_gadget.get()

# use extended method provided to destroy dialog cleanly
d.uispy_destroy()


uiS[cript]Py: Announcement. uispy download available

logo_400pxw

I have decided to make available a python wrapper for Houdini’s uiscript. It has been the result of needs I have had and was largely ripped from another defunct project. It should be considered alpha. I am aware of a couple efforts to do this, however I think uispy is fairly robust and useful.

Hopefully this will also provide an exploratory opportunity to document its clean-up here on  eyevex.com bit by bit in the New year (assuming compatibility with h16 for now). At that time some examples, tutorials and explanations will be coming, until then feel free to download and poke around.

It is acknowledged, that a few things are broken or missing, some the scripts are a bit hacky, there are places for improvement, and a bit that is completely wrong, but working. This is alpha, which mean it has only been used my myself and really only on a specific setup, in my case that’s Linux 64, kubuntu. Earlier versions were tested win win7, but have not been in sometime. Its development also means it lack some safety checks and sometimes you may be allowed to use values that wont properly build the dialog. This will be an area of improvement as the module is cleaned up.

Why do this at all…. There’s a few reasons to… and a few reasons not to. As uiS[cript]py uses only standard python and built-in Houdini libs, it provides a clean and safe way to create simple dialogs beyond the basic tree, multiline and lists in HOMs hou.ui While currently pySide and pyQt provide ways to build large robust interfaces, often a simple native dialog without worrying about qt deps or learning large libs is needed, and this fills that space. For those familiar with parmameterTemples in HOM, the naming of methods and usage closely mirrors that workflow. UI Script is also used for Cpp plugs as a quick way to build interfaces, in the future this may provide an easy way to design uis visually and dump the script.

This is a more advanced topic and not all basics wont be gone over, hopefully all interested will get something from it, but in the end the inner workings will likely most interesting to Pipeline/dept/show Tds. Example usages will probably be of broader interest and for reader that just wants to get to using it.

happy CG’ing. (|;-D>

eyevexTools HOM redundant functions depreciation

This space has gotten a bit stagnant and as for a multitude of reasons several post never made it to publish, however I am moving forward with a larger series on uiS[cript]Py. Most of eyevextools is working although need to be tested in recent versions. However, a lot of the much needed functionality we explored here has since appeared in the HOM module. This is great, but has made much of EVT redundant. In the near future I will be depreciating these parts. Posts and downloads will remain available for those that want to follow along but depreciated features wont be maintained.

(|;-D>

Looking Through: part 6 — Whats Included

This series of posts looked very closely at Camera and Light node types and how to write a function that does its best to determine likely matches to the viewport transform matrix in order to determine what object node is being looked through.

The functions described are now included in ui.py 0.2.0 and ui.py is now included in eyevexTools 0.4.0 with the usual comments and doc strings. As an extra convieniance the following function were added, simply calling viewportObjects() with various flags set….

  • viewportLights() – additionally flags off all camera types
  • viewportCameras() – additioanlly flags off all light types
  • viewportStereoCameras() – only stereocam and stereocamrig are flagged on
  • viewportStereoCameraRigs() – only stereocamrig is flagged on
  • viewportMonoCameras() – only camera is flagged on

Hopefully after reading this series a custom function could be easily built similar to viewportObjects() by calling viewportObjectsOfType() for your own custom camera or light types as well.

I would also like to thank James Fisher Lighting Guru for verifying some lighting practice info for these posts.

….Thats about wraps this up. As usual, if you have questions, feedback, or bugs found drop me a message.
(|;-D>

Looking Through: part 5 — Narrowing

The base function constructed in the first part of this series of posts takes a tuple — node_types to pull the instances and perform the matching. The last two sections went in detail on the types that will be searched for and why the defaults can be expected to be flagged on or off to avoid the most false positive results and remain the most useful. Below the new function and args are introduced…

def viewportObjects(

light=1,
hlight=1,
envlight=0,
indirectlight=0,
cam=1,
stereocam=1,
stereocamrig=1,
ignore_ipr_cam=1
):

 If the last two sections were looked at these args and defaults should be of no surprise. The one exception is the last arg, ignore_ipr_cam, which will be explained in a moment.

Each arg’s flag is tested and the type append to a list, that eventually gets used as an arg for the base function. ie…

# check for light if flagged
if light:node_types.append(‘light’)

After all the flagged on types are appended…

# look for matches
viewport_objects = list(viewportObjectsOfType(node_types))

There is a hidden camera node /obj/ipr_camera which will match the viewport transform. If you need to see it to believe it, go to the network editor, press CTRL+L and paste /obj/ipr_camera into the address bar and you will be inside the ipr cam node. Whenever we flag on cam as a type we are looking for, it will give us a false positive result, so we need to remove this from the results. As it is of a desired type, the easiest was it to check the name against ‘ipr_camera’.

# remove ipr_cam if flagged
for obj in viewport_objects:

if obj.name() == ‘ipr_camera’:

viewport_objects.remove(obj)
break

Lastly when there a results, they are returned as a tuple.

if len(viewport_objects) > 0:

result = tuple(viewport_objects)

return result

And thats about it! It should now be clear on how to construct a usable function that return a light/cam matching the viewport transform matrix. The last section will look at what included in the download module and what is incorporated into eyevexTools.