Looking Through: part 2 — Basics

It is best practice to keep things as general and reusable as possible, so the first task is to design a function that takes a tuple of object types and returns all nodes of that type whose transform matrix matches that of the viewport — without being concerned about exactly what it is being looked through.. To get the current viewport, toolutils is made use of.  It gets imported along with the hou. toolutils is included in Houdini and is made use of by the shelf buttons amongst other places. I highly recommend exploring it.

import hou
import toolutils

As an arg to this function a tuple “node_types” expects a operator types as strings. You can quickly see the node type by pressing MMB over a node in the network editor.

def viewportObjectsOfType(node_types):

Included in toolutils is a method to grab the active sceneviewer tab and from there we can get to the viewport and then pull the transform.

cur_viewport      = toolutils.sceneViewer().curViewport()
cur_view_xform = cur_viewport.viewTransform()

node_types is ensured to be a list and then iterated through. We use hou.nodeType with scope limited to object types to gather all instances of each of the types passed in node_types and place them in a list, as lights and cameras are object level nodes.

# get all the objects of specified types
all_possible_nodes = []
for node_type in list(node_types):

found_nodes = hou.nodeType(hou.objNodeTypeCategory(), node_type).instances()
all_possible_nodes.extend(list(found_nodes))

The list of matching instances is then iterated through, pulling the transform and testing if its equal to the transform pulled from the viewport. If it is a match, its appended to the list matching_nodes, which is then turned into a tuple and returned.

**NOTE** However, if you set the viewport to look through a light ie “mylight”, pull the transform of the viewport and the light you might notice sometimes  they don’t entirely match and therefore fail an equality test. ie …

>>> cur_viewport.viewTransform() == mylight.worldTransform()
False

This is because of precision differences where the amount of decimal places will mean they aren’t always totally equal even though for all practical purposes they are. Fortunately sidefx dealt with this by providing a method as part of matrix and vector objects– isAlmostEqual() –which as the name implies returns True when almost equal.

# look for a matching transform
matching_nodes = []
for node in all_possible_nodes:

if node.worldTransform().isAlmostEqual(cur_view_xform):

matching_nodes.append(node)

# return as typically expected tuple
matching_nodes = tuple(matching_nodes)

return matching_nodes

  And thats it! -A general function that will match any object node of a specified types to the viewport. Another function is going to be built calling viewportObjectsOfType() but specifically for light and cameras.

Next is looking closer at Houdini light nodes and considering them in this second function.

Looking Through: part 1 — Looking For.

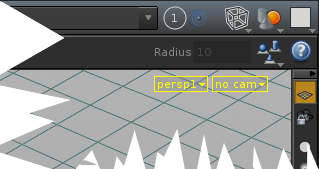
For those unaware, the small yellow box in the upper right of the viewport can be used to set a camera or light as an object to “look through.” Many are familiar with this behavior from other 3D packages. To give it a try, pull down the menu and select a camera from the list of use the submenu to select a light. Or alternatively, drag a light or camera node from the network graph and onto the viewport.

h12 upper right viewport

h12 upper right viewport

Determining the camera/light object already being looked through in the viewport has come up on forums as well as the sidefx listserve several times. I had myself sent out a message about it some time ago as I was sure there “had to be” a built in HOM function to pull this information, without delving into C++, after all, the little yellow box displays the name of what being looked through so theres some awareness, but it turns out there is no built in HOM method to do so. There needs to be a custom one.

In previous posts, moving up a level and matching locations was used as a way to determine if a node overlapped with a netbox. Similarly, the 3D transform matrix of the viewport can be matched to that of a light or a camera to determine if we are viewing through it. Of course, there is a risk of multiple objects with the same transform, but in practicality it is unlikey other than cases of unrotated objects at the world origin. The final scripts will do its best to minimize this scenario. There are also special case scenarios when dealing with stereo cameras and three point light which will be looked at.

First, lets look at the base function and how it will work.


eyevexTools updated to 0.3.1

Apparently, in my sleepy haze I had forgotten to add the py lib folder/name.
This new zip has it present and named correctly.

There are no other changes so, if you downloaded 0.3.0, just make sure all the python files (that were in a folder called ‘python’ in the zip) are installed inside the appropriate python location in a folder named ‘eyevexTools (without the quotes).

i.e. $HOME/houdini11.1/scripts/python/eyevexTools/*.py

** Thanks reader Dan W  for spotting my lack of coffee at time of upload… oops… Sorry about that…
(|;-D>

Working Netboxes: part 4 — On the Shelf.

A little documentation on the provided shelf tools and use…..
eyevexTools ver0.3.0 netbox shelfPick Up : Picks up under-nodes and includes them in the network box. Three use scenerios:

    • Only network boxes selected: all net boxes pick up all respective under-nodes
    • Only nodes selected: selected nodes are picked up by the network boxes above them
    • Mixed network boxes/nodes: selected nodes are picked up IF the network box above them is also selected — selected netboxes pick up selected nodes exclusive.

Drop: Drops a node in a network box to beneath. Usage scenerios are similar to Pick Up

Grow To: Grows the network box to include specified nodes. Select a single network box and nodes then press.

Move To: Moves nodes to inside a network box. Nodes do not need to be at the same hierarchical level, only of the same context (i.e. Sops). Select a single network box, nodes in one or more neteditors, and press. Layout flagged on by default.

Merge: Merge the contents of multiple Netboxes. Similar to Move To, but only network boxes are operated on. A Dailog open to select which network box is the destination.

Custom Color: Set a network box to a custom non-swatch color. Select network boxes and press button, in dialog enter RGB float values and press the ‘set color’ button. (0.05, 0, 0.1 makes a nice deep purple.)

Pick Up All: all network boxes on all open networkeditor panes pickup all their respective under-nodes. Just press it and it goes.

Layout: layout, sizes and and organizes the contents of network boxes. Select netboxes and press. Takes into account under-nodes by default

**NOTE (again)  : A word of precaution. The layout shelf tool allow multiple selected netboxes to be operated on in a single click. Layout does its best to recenter the resized netbox. As a result it can inadvertantly overlap with another box. In such cases an under-node can get “passed” from one box to a subsequant netbox being operated on, that detects it beneath it as well. Care should be taken when running on multple netboxes in close proximately to each other.

….Thats about it, hope a few people got something out of this feedback is always welcome.
(|;-D>


Working Netboxes: part 3 — Get One.

What’s selected: A way to query selected network boxes is essential for the interactive shelf buttons, in oder for there to be an easy way to pass network boxes as well as nodes for operations. This is another one of those things we expect to do because we can with nodes, but cannot. We can however check if a netbox is selected…

# check if a network box is selected
my_netbox.isPicked()

… so we need to gather a list of network boxes and return only the selected one by testing via the isPicked() method. This was the motivation behind the creation of ui.py mod. It currently contains two more general functions

  • paneTabsOfType() — while there is a function that return the first panetab found this one returns all.
  • currentPaneTabsOfType() — builds on paneTabsOfType() but only return those active (pane tabs in the foreground)

… so selectedNetworkBoxes() is the new function to return a tuple of hou.NetworkBox objects similar to hou.selectedNodes() or hou.selectedNodeBundles() by gathering the network editor paneTabs, retrieving the network boxes shown and checking their selection status. Since the related provided methods exist at hou.* level, similarly in addition to existing in netbox.py its imported to the lib root as eyevexTools.selectedNetworkBoxes()

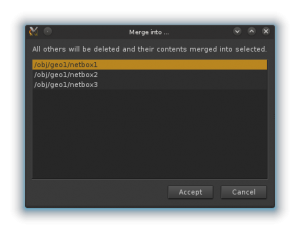
Since, unlike the provided methods for node selections, theres no reliable way to know what the last selected netbox is, a GUI dialog requesting which is the destination netbox was created to the merge button. This lead to the creation of the ui.py module where these specific dialogs are now stored.


eyevexTools selectNetboxFromListFormMerge dialog

eyevexTools selectNetboxFromListFormMerge dialog

A netbox has  more in common with a sticky note  than a node. While network nodes, like subnets, are a type of node that can contain other nodes — this is obvious when we use them. However subnets also contain network boxes. These are not considered children. and when listed ..

# list all child nodes of a network node
my_subnet.children()

… only hou.Node types are in the tuple returned, even when networks boxes are present. They however can be listed …

# list all network boxes in a network and store result
netboxes = my_subnet.networkBoxes()

…. we can then get the nodes within a box…

# store a tuple of nodes contained with in the 1st returned netbox
my_netbox = netboxes[0]
my_netbox_nodes = my_netbox.nodes()

if any of the nodes returned are also a network, its children could be listed in so on. If we want to go from one of the nodes in my_netbox (also a child of my_subnet – remember netboxes aren’t part of the hierarchy) back to my subnet we can grab a ref with a hou.Node method parent() which is the counterpart to children()

# get the parent network from a node found in a netbox
my_node = my_netbox_nodes[0]
my_nodes_parent = my_node.parent()

this makes logical sense, as if we can go inside, we expect to be able to get back outside. However there is no similar counterpart to networkBoxes() method of hou.Node, so while we can get membership from a netbox — we can’t find the network box from one of its members. We might expect that we could because of our previous dealing with nodes. Fortunately Houdini will allow us to make this happen.

Two new functions are introduced…

node.evt_networkBoxAround() — eyevexTools function (shown with the method prefix) returns the netbox which the node is a member Since it has no hierarchical  function this isnt really a ‘parent’ but can losely be thought of as a sort of Uncle.

node.evt_networkBoxAbove() — eyevexTools function (shown with the method prefix) returns the netbox above the node – the node is the boxes ‘under-node’ and ghosted out.

For networkBoxAround() we need to find a netbox from one of its members, we do this by moving up one level, gathering all the netboxes and the looking amongst each members untill a match is found. a similar technique is employed in methods mentioned in the last section to find under-nodes by checking if each at a level fall withing the bounds of a netbox.  These aren’t  very algorhymically efficent but in a common technique in practice when necesary to search for somehting. There is a practicality and the trade off in time invested and in noticable gain. And for the moment, it scales ok, and can be improved upon to scale better later.

networkBoxAround() and networkBoxAbove() along with layoutNodes(), nodesOverlapping() and nodesUnder() form the basis for which most of the other custom function buld on and are what allow us to get a networkBox

The last section will look at the shelf tool use….


Working Netboxes: part 2 — Inside and Under

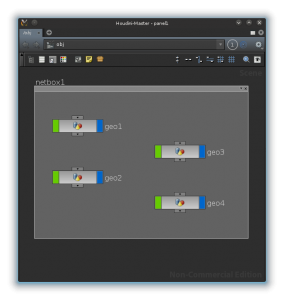
Often when working with a network box, a node may inadvertently be removed and appear to have dropped beneath it. To get it back inside it needs to be dragged outside the box, let go, and returned to the inside.  This is a well known bug.  A shelf button to pick up a node without dragging a u-turn in the graph would seem useful. Well… there’s a half sarcastic old code adage — ” A well documented bug is a feature ..” What if we took advantage of this behavior.

H11 Netbox with node dropped beneath

Typical network box with a node dropped beneath.

By making dropping and picking up nodes accessible, they can be used in new and interesting ways.  When the node is ‘under’ the netbox it has a ghosting effect highlighting the others. Another workflow could involve having a group of alternate nodes where one is dropped down to be worked with temporarily so the box can be collapsed moving the other nodes out of the way. I’m sure there are other interesting ways these behaviors can be taken advantage of and would be interested in hearing of them.

# get all nodes inside network box
my_node.networkBoxes()

… the above wouldn’t return what here forward will be referred to as ‘under-nodes’ ( the nodes dropped beneath). Since many the introduced functions/tools rely on querying node and netbox size/positions in the graph  they  currently rely on the netboxes NOT being collapsed. Logically this makes sense since they would not have much visual effect otherwise.  Most functions from these posts can optionally consider under-nodes via flags, however on the shelf, the merge button doesn’t consider them by default although allows this feature to be flagged on. The tools presented should accommodate such alternate workflows. Along with the provided hou.NetworkBox.nodes() method, there will be three ways of retrieving membership depending on what is being looked for.

  • my_netbox.nodes() — hou provided method returns the nodes ‘inside’ the netbox
  • evt_nodesOverlapping(nodes=[]) — eyevexTools function (shown with the method prefix) returns all nodes inside the box and under-nodes (netbox must NOT be collapsed). Optional nodes args allows passing of a list to filter through returning only the overlapping members rather than all overlapping nodes
  • evt_nodesUnder(nodes=[]) — similar to above nodesOverlapping() but only returns the under-nodes

Elemental to keeping things clean is the creation of a layoutNodes() function that will layout the contents of a network box similar to layout() as it applies to networks and nodes. This layout function is mapped to a shelf button for easy access to operate on selected network boxes, as well as a flag on most other tools including mergeNetBoxes and moveNodesInside It is flagged on by default on all shelf buttons and functions. It too relies on the netbox being uncollapsed (why would you layout something you can’t see anyway?) and preserves under-nodes by default.

**NOTE : A word of precaution. The layout shelf tool allow multiple selected netboxes to be operated on in a single click. Layout does its best to recenter the resized netbox. As a result it can inadvertently overlap with another box. In such cases an under-node can get “passed” from one box to a subsequent netbox being operated on, that detects it beneath it as well. Care should be taken when running on multple netboxes in close proximately to each other.

The next section will take a closer look at these and other techniques for getting a reference to a Network box.

Working Netboxes: part 1 — Where to Start …

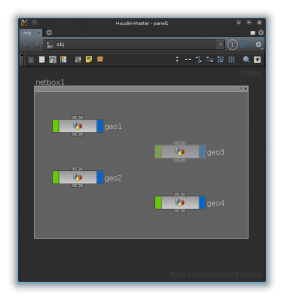
Network Boxes or simply  ‘netboxes’ are  great ways to organize nodes in the network graph.  They don’t alter the node hierarchy and therefore a safe way to organize and visually group and can be a sort of nondestructive replacement for a subnetwork. However they are intended as visual aids they lack some scripting and interface features we have come to expect from nodes. Although some of these limitations makes absolute sense in terms within in the structure of Houdini, visually one might expect otherwise.  Some of these features can be added and made more convenient via some creative python and HOM

Typical H11 Network Box

Typical Network Box in default gray.

While working on the netbox.py mod I realized, although I have been trying up to this point to keep blog post in a 1:1 ratio with modules, it wasn’t worth the trouble for the confusion it will in this case likely cause. For example, a function retrieving a netbox from on of its member nodes — actually belongs in a module dealing with nodes, as we are requesting something of the nodes, in this case, and not a network box – despite what is being returned. As a result this series of post introduces node.py in addition to netbox.py. Also introduced is ui.py, which has more general functions and is in in a similar vein to hou.ui. Lastly,  dialogs.py stores GUI dialogs specific to eyevexTools (largely for shelf buttons), since it is a good practice to separate such interfaces which are not needed for command line functionality.

node.py mod includes a function extendHouNodeClass() and netbox incudes similarly extendHouNetworkBoxClass().  These two functions add the methods in the mods to the hou.Node and hou.Networkbox classes respectively in session .  Techniques like this is partly what makes python so popular and also what makes many coders of other compiled languages cringe. However it is convenient and allows the methods to be called along side the provided ones. The added functions appear on the object as methods prefixed with ‘evt_’ hopefully make the distinct None of the code in eyevexTools nor the shelves actually use this technique.

These will also be the first series of posts/download featuring shelf buttons.  For artists coming from other applications such as Maya or Mudbox, the shelf is a familiar interface and the first place where common tasks are often looked for. eyevexTools lib download will also have a folder ‘Icons’ as well as ‘toolbar’. The installation instructions have been updated to include these. Shelf tools are great way to make things quick and accessible via a mouse pointer. Many times when asked to create a ‘a simple tool’ for Houdini, all that was required is querying a selection and running a method that already existed, as there are so many functions it would be absurdly cluttered to present them all in the interface. So, sometimes special use cases just require elevating one of these function to be accessible to non-scripters.

SVGs are a scalable vector graphic and a standard format that are accepted many place in Houdini (some of which will also accepts PNGs) Since they are vector they scale better in the shelves for different ui sizes and look much better. Plus, places where PNG might be required, like a help card, a PNG can also be exported from most any vector graphic  software. Inkscape is a free and open fully featured native SVG editor that runs on linux, windows, and OSX. I used it to create all the icons and highly recommend it.

These posts will not be going further in depth on shelves. Basic creation of a shelf and tool is easy, create a new shelf via “+” button on the upper right of the shelf set. The RMB on a blank spot on the new shelf, and choose “New Tool.” Give it a name, label, and icon if desired and then decide what script you want to run and accept. You can then edit the shelf file directly by looking in you $HOME/houdiniXX.x/toolbar folder in you favorite text editor, to see what was written out. If you do want to make changes by hand makes sure all Houdini sessions are closed or it can become illegible quickly)

OK, lets get get started…..

Take and takes: part 2 — Where and about.

end thoughts …
All appears to work reasonably well in h11.1.xxx –Although, I have yet to test it in any  harsh or production environment. So, anyone who does, feel free to email me some feedback, it’d be appreciated.

There’s some conveniences I ran across in hscript docs that I might like in python. As mentioned in part 1, I wanted to keep the module clean, but I may implement a companion module, if I find myself really wanting it. I also made a fair attempt to add docstrings tha’tll show up in the help popups in Houdini and to keep it generally looking the same as the rest, but some finer ui things like dragging a take into the py shell and expecting the object aren’t working

There are some methods of Take object in particular that are best guess where assumptions had to be made as they were necessary features but have some error potential going forward. There are some places where there was no sense in implementing a feature and still others that are necessary ‘hacks’. This is all noted below.

what is available for download
This scripts are available in takes.py in the script downloads section as well as incorporated into eyevexTools py modules also available for download

basic use
import eyevexTools.takes

# use for creating a new take….
mytake = eyevexTools.takes.Take(‘mytake’)

# it is recommended to use find or a listing function instead of the wrapper directly
mytake = eyevexTools.takes.findTake(‘mytake’)
curenttake = eyevexTools.takes.curTake()
roottake = eyevexTools.takes.rootTake()
alltakes = eyevexTools.takes.allTakes()

caveats

  • unable to implent the XML export as the format can be arbitrary
  • although it is impossible to know is the path would be returned in the presented format, It was needed for this implementation but may not be compatable
  • It is not clear if insertTakeAbove and moveUnderTake will be returning parent or child. I assume it to be child.
  • EYEVEX_TAKE_PREFIX is a hscript env used to store the take prefix (when not default), as hscript provided no facility to retrieve it after being set
  • allAllParmsOfNode method in the docs is assumed a typo/error and that it is method addAllParmsOfNode -which is how it appears in this implementation, but can be a risky assumption.
  • asCode method doesn’t include the code for wrapping the take

(|;-D>

Take and takes: part 1 — What and Why.

Takes in Houdini are an extremely powerful and flexible way to nondestructively try different parameter values in the same session, create render passes for lighting, and create and compare variations. In the series of posts on FauxLiner, we looked at reasons and ways to combine and wrap hscript with hython.  The takes libraries is more elaborate but is done in a similar fashion and for similar reasons.

The takes system is currently accessible from hscript but not hython.  As takes is so powerful and versatile, it is often needed from python, particularly as larger pipeline and tool scripts move to hython. This often results in wrapping hscript take commands in similar looking python code. For example,we can  look at a simple take related command, takename  This can easily be wrapped in pyton, making an equivalent accessible in HOM for take renaming.

Docs Usage example shows:
takename take new_name

# this can easily be python wrapped as
def takename(take, new_name):

hscript_cmd = ‘takename ‘ + take + ‘ ‘ + new_name
hou.hscript(hscript_cmd)

return None

And this is done and done often. It is very common to redevelope or rebuild similar scripts and tool utilities again and again at different jobs or in different projects. Wouldn’t it be easier to have all these common wrapped Houdini take related commands available in a python library while awaiting the official hython takes release ? — the presented python modules attempt to do just that.

This is a ‘stop-gap solution’. Lets briefly go over what is typically meant by this. In short, there is a time lag or a ‘gap’ between what is needed (in this case python access to Takes) and what is available (the official hython release by sidefx is not in current builds). We need to ‘stop’ the gap with an implementation or ‘solution’. Stop-gap solutions aren’t usually elegant and often rely on brute force (we could have this library pull from the HDK C++ libraries which would be more efficient and flexible, but sidefx should eventually be distributing this, so we avoid al ot of extra work by taking a efficiency hit by wrapping hscript). Stop-gaps are intended to be temporary measures and come in two basic varieties: The first is a branch of a tool, project or pipeline that “does the job” and when the gap is passed will be completely discarded as the proper released solution moves into the main fork. The second type moves inline with the tool, pipe, or project and is intended “to transition” to the final solution, which then in itself will be transitioned to from the stop-gap solution. The second variety tends to get employed when the time frame for the final solution is long, unknown, or of unknown stability/compatibility. The Takes solution presented in these posts is of the latter variety.

The first decision that was needed is whether or not to present the wrapped hscript takes commands in a similar 1:1 fashion as shown with takename above. For those who already know hscript, it would be very easy to guess the py equivalent. But wait… When looking in the Houdini docs it would appear there are already some indications on how this may be implemented, if we look at hou.takes and hou.Take. These two docs have what appear a fairly complete list of functions to deal with takes, what methods the Take object will eventually employ, and what kind of values we can expect to be returned by the functions and class methods. Although the docs lack any real description of use, some assumptions can be made by drawing parallels with what is already known about the hscript implementation. The function naming is also descriptive and provide insights. i.e. It can be assumed that…

hou.Take.addParm(self, node)

…will eventually add a parameter to the take that this instance of hou.Take represents. Because we have access to the mentioned information on the possible eventual sidefx implentation, this library models itself after it, and NOT a 1:1 hscript wrapper. This provides additional advantages…

  • forward compatibility (easy upgrade path): by keeping the function names and return values in sync with what we expect the official hython release to be we ease upgrading. Ideally it would be as simple as finding all “eyevex.takes.Take” and replacing them with “hou.Take”, but in reality its not likely going to be THAT easy.  We can avoid introducing additional problems by resisting the temptation to ‘improve’ on the functions and args presented in the docs with changes, and keeping such enhancements in a separate module which can continue to be used, even after the official release.
  • full advantage of pythons object oriented features: when the rest to tools using the library are taking advantage of hython OOP features it could be awkward to deal with the separate procedural style of straight python wrapped hscript
  • reduced breaking changes if the ‘gap’ lasts longer than anticipated: since it is unknown when the official implementation will arrive, there remains the possibility this could fall into long term or indefinite use. Especially considering the library will be distributed, by keeping the function names and return as close as possible with the docs, all the function bodies in between can change. The initial inefficiencies in a quick stop-gap solution that are acceptable may become cumbersome in long term use. This allows the function bodies to be rewritten for greater efficiency or even pull form HDK level (if for some reason this became worth while) without having to alter any code utilizing the modules.

Continue to the next section for download information, as well as potential differences between the presented modules and what will eventually ship in the hou module with Houdini.

FauxLiner: part 4 — Now What.

end thoughts …
In these posts we looked at how to make a tool to help transition new artists to Houdini and allowed a different accessible way to select nodes at different levels. We talked about various hiccups that one might run into when developing such a tool including mixing languages, issues with documentations and reversing in script what was previously done in the GUI.

There are some areas that could be far more compact but for the sake of instruction readability is favored over compactness. A python floating tab could have been used as well, but keeping it in hscript allowed us an easy way to devise the script in steps and allow the title to display cleanly in the floater.  The technique of returning a python ref to a preexisting FauxLiner helped keeps the function simple in addition to making sense since having multiple floaters would not offer anything additional.

what is available for download
This script is available in floaters.py in the script downloads section as well as incorporated into eyevexTools py module also available for download.

In addition to FauxLiner, floaters.py in both cases also contains “Quick Bundler’ (floaters.quickBundler() ). This is a floating panel with a bundlelist pane paired with the FauxLiner.  This is made specifically with rapid bundle creation and editing in mind. I assign “add to selected bundle” in the hotkey editor to CTRL+” Then with the Quick Bundler open, you can rapid bundle by:

  • activate/create bundle on the left
  • select node from any/all levels via the FauxLiner on the right
  • just move pointer over left side and press your hotkey
  • repeat …

caveats

  • currently with the quick bundler, there cannot be any other floating bundle lists open. This is a known issue.
  • after opening either floater, you may go to list mode in the node graph for the next network you create. It seems to only do this once. Press ‘t’ over the node graph to toggle it off list mode