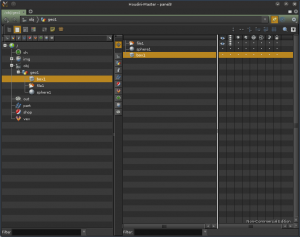
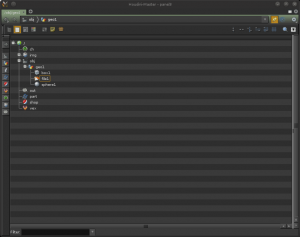
So, now we have a good idea of what we want in the end floater, why we need to implement it, and that it does currently exist in some form accessible from the GUI, although there are a few issues to overcome. We want the end result to be a python function, where we can easily grab a ref to the floater for future manipulation and for easier integration with other python scripts and parts of the GUI.
Unfortunately, after looking through the docs and experimenting, there is the realization this can not be done exclusively with python. The floating pane can be created and some of the unneeded UI elements hidden — but thats where the fun stops. List mode can be toggled on but List Order can not be, neither can a lot of the other subtle changes we tried out in the GUI in part 2. There is also the issue of pane linking we will get to a little later. So we need to figure out the initial implementation in hscript and move forward from there. We saved our ‘scrap’ desktop in part 2 which has our preconfigured floater saved with it, so that seems like a good place to start investigating.
Navigate to the desktop file in your Houdini directory and open in your favorite text editor:
- go to your home directory
- look for houdiniXX.x (where XX.x is the ver number)
- inside houdiniXX.x find ‘desktop’ folder and go inside
- you should see scrap.desk, this is our saved desktop from part 2
- open it in your text editor
we want to find a floater of neteditor pane type, so find ‘neteditor’, there may more than one, but the line of the one we want ends in ‘FloatingPanel’ — we know this because — well it was a floater. Copy that line into a new document. It should look something like this:
neteditor -G 0.75 -T 0.375 -K 0.3 -C 0.55 -p 0 -c 0 -o 0 -n 1 -s 3 -x 0 -w 0 -k 0 -I 0 -B 1 -D 0 -L 1 -S tree -t comments subnet none -g 0 -a 0 -y 0.5 -m e -r 2 1 -N 1 -H 0.22 -V 0.22 FloatingPanel
related to this floater you should also see immediately below it:
netviewdep -l 0 -c 0 -C 0 -e 0 -E 0 -b 0 -S 0 -s 3 FloatingPanel
and several line similar to:
netcolumns -c display,xray,select,origin,capture,bone -n OBJ FloatingPanel
if we look in our hscript reference we can see what these commands do. In short, the first ‘netviewdep’ configures options for the network graph which is irrelevant since we are not using it. The calls to ‘netcolumns’ configure what columns to toggle node flags are available for what node and network types. We will be deemphasizing this portion of the list view since our focus is selection and to a lesser degree navigation, so its fine to leave at defaults. We can ignore the other lines relating to this floater, but I did want to touch on the fact they were related and did do specific things although in this case they are not relevant.
Right away its noticeable that there’s whole lot of flags and a good chunk switched off (value ‘0’). There are flags representing alterations we may want to switch on for the FauxLiner that that weren’t obviously accessible from the GUI. The string we pulled from the desk file isn’t particularly nice to look at, really understandable nor clear. We need to figure what these flags do and break them up eliminating some that are being set to default values and causing clutter, in addition to changing the bool values of some others.
Open the hscript reference page for neteditor. Look up the ‘-S’ flag that appears with the value of ‘tree’ in our panel configuration. What?! According to the docs the only values accepted are ‘user’, ‘alpha’, ‘type’, ‘hier’, and ‘netbox’? This is partially why we didn’t start with the command as in the docs. Incomplete documentation is an issue that can be ran into now and again as hscript faces antiquation and the equivalents have not appeared in hython, along with obsoleted hscript that may not function as expected. If you look through the long list of configuration flags for the neteditor, it can be noted there are several that do not appear in the docs and vice verse. We need to add the flags from the docs we may need and test toggling the values on the undocumented ones to observe what they do. First we need a floating net editor to play with.
SHFT+ALT+t will open a text port. Create a floating pane (differs from a floating panel as already lacks the tab UI) with dimension 600×600 named FauxLiner with the following
pane -F -w 600 600 -n FauxLiner
the following ensures its a neteditor
pane -m neteditor FauxLiner
we can then run (filling in one or two flags in place of ‘…’ and see what happens
neteditor …. FauxLiner
this can get tricky as some changes may not be apparent unless other flags have been set (ie flags affecting list mode wont have an apparent effect if we are not in list mode currently. Likewise some flags are expected in order so keeping with the order as we had copied from the desk file makes it easier. When adding a new flag from the docs, care should be taken as to where in the sequence of flags it is added and sometime this requires a little trial by error. In the end the sequence of flags below got the results i was looking for:
neteditor -K 0.3 -C 0.55 -p 0 -n 1 -x 0 -w 0 -k 0 -I 0 -B 1 -D 0 -L 0 -S tree FauxLiner
Earlier, issues with pinning and linking were mentioned. We want to assign this floater an unused pane link group. For those unaware, in addition to the newer pane pinning behavior there are also pane link groups. These allow a number to be assigned to panes. All panes with the same group number move together similar to the behavior of all panes being unpinned. This behavior tends to work nicer with some scripts in addition to a powerful way of managing a large amount of panes that can accumulate.
We don’t want the FauxLiner to get accidentally included in a group. Essentially we want it permanently pinned and unaffected via other pane navigation, by setting it to an unused group. The menu under the pin displays 1-9 as the group options. Similarly these are the same as accessible via hython. However using hscript we can set any 1 or 2 digit group number. This is great setting above ‘9’ means there would be no way to have it accidentally included via the gui or python. To set it to ’99’ we use:
pane -l 99 FauxLiner
remember the issue during the mockup of all neteditors toggling to list mode initially once we get to the level the floating pane was set to list or deeper? What we need is hierarchal level that above anything set in GUI. Such a level does exist and is called ‘the director’ and displayed as ‘/’. By opening the Fauxliner at the director level we not only have access to every node in the scene going deeper, but now set on a level above what can be accessed normally bypassing our list toggling pitfall! (*NOTE: an interesting side effect of having everything listed from the director downwards is being able to select the manager network nodes immediately below the director i.e. ‘/obj’ etc..) The following opens the list at ‘/’ via ‘-h /’ and is combined with the toggling off of the navigation in the pane.
pane -a 1 -A0 -h / FauxLiner
We now have a complete (and very compact) hscript that can be used to create our FauxLiner!!!
pane -F -w 600 600 -n FauxLiner
pane -m neteditor FauxLiner
pane -l 99 FauxLiner
pane -a 1 -A0 -h / FauxLiner
neteditor -K 0.3 -C 0.55 -p 0 -n 1 -x 0 -w 0 -k 0 -I 0 -B 1 -D 0 -L 0 -S tree FauxLiner
This COULD be pasted into a .cmd file in the script path and sourced to recreate our FauxLiner, as a complete tool. But this doesn’t totally meet the objective of being accessible via python and lacks configurability.
We can formulate hscript commands as a string argument to a python function that calls hscript from python and return results. The function is appropriately named hscript and is a method of the hou module. If we look at the HOM reference — “…specify multiple commands by using ‘;’ or the newline character as the separator…”. So, we need to encapsulate each command in a python string ending with a newline ( \n ) and send it as arg to the hou.hscript() function. To keep things clean as possible, we will assign each individual line to a variable named meaningfully to the commands purpose, place them in a list, and lastly join them to a larger string to be evaluated.
# build command strings
cmd_make_floater = ‘pane -F -w 600 600 -n FauxLiner \n‘
cmd_link_pane = ‘pane -l 99 FauxLiner \n‘
cmd_set_tab_type = ‘pane -m neteditor FauxLiner \n‘
cmd_format_tab = ‘pane -a 1 -A0 -h / FauxLiner \n‘
cmd_setup_neteditor = ‘neteditor -K 0.3 -C 0.55 -p 0 -n 1 -x 0 -w 0 -k 0 -I 0 -B 1 -D 0 -L 0 -S tree FauxLiner\n‘
# create the hscript arg string and ececute it
hscript_cmds = [cmd_make_floater,cmd_link_pane, cmd_set_tab_type, cmd_format_tab, cmd_setup_neteditor ]
hscript_string = ‘ ‘.join(hscript_cmds)
hou.hscript(hscript_string)
Now that we have our hscript nicely wrapped in hython, lets turn it into a function. We are also going to add some args for the window height and width, and the pane link group (in that rare case 99 is occupied). A check is also added to look for the FauxLiner floater already existing as since it is a flat list and the selections are global. Lastly, we find the floater we created so we may return a py ref to it. Here the finished script below.
import hou
def fauxLiner(width=450, height=600, pane_link=99):
# check if it already exist
if hou.ui.findPaneTab(‘FauxLiner’) != None:
return None
# convert the passed numebrs to strings
width = str(width)
height = str(height)
pane_link = str(pane_link)
# build command strings
cmd_make_floater = ‘pane -F -w ‘ + width + ‘ ‘ + height + ‘ -n FauxLiner \n‘
cmd_link_pane = ‘pane -l ‘ + pane_link + ‘ FauxLiner \n‘
cmd_set_tab_type = ‘pane -m neteditor FauxLiner \n‘
cmd_format_tab = ‘pane -a 1 -A0 -h / FauxLiner \n‘
cmd_setup_neteditor = ‘neteditor -K 0.3 -C 0.55 -p 0 -n 1 -x 0 -w 0 -k 0 -I 0 -B 1 -D 0 -L 0 -S tree FauxLiner\n‘
# create the hscript arg string and ececute it
hscript_cmds = [cmd_make_floater,cmd_link_pane, cmd_set_tab_type, cmd_format_tab, cmd_setup_neteditor ]
hscript_string = ‘ ‘.join(hscript_cmds)
hou.hscript(hscript_string)
# get a py ref to the window
result = hou.ui.findPaneTab(‘FauxLiner’)
return result

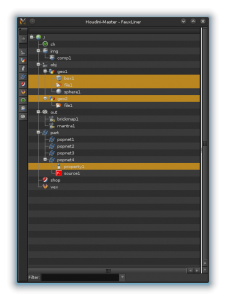
FauxLiner showing muli-node selction from different heirarchical levels in H11
Thats about it! We now have a functioning floating Outliner-like pane that should not disrupt other parts of Houdini’s interface! It also inherited a few nice features from the regular list view I chose to leave exposed including the filter box and the filter by type tabs on the left (which can still be stowed).
You can now delete the old scrap.desk as it no longer of use. Continue to the fourth and final part for after-thoughts, usage, caveats, and download info.


